
Whether you are getting viewers to view your video or not, the initial minutes of the video will decide the fate of the viewers. The introduction can allow your content to be prepared, reflect professionalism, and create trust in your audience.

Dying to produce beautiful intro graphics, add your own voiceover, and create a beginning sequence to impress the audience perfectly frame by frame, you can just cut some nice designs with ease by using producer tools such as CapCut Desktop Video Editor.
The secret is in the combination of a powerful visual and a captivating voice that will not only make your videos look professional but also help them associate with your listeners or subscribers on a more personal level.

This article not only discusses the usefulness of intros but it also takes you through a five-step simple process to make one using the in-built features of CapCut, as well as explains why editing tools such as the voice changer, the ability to use video editing software, and online photo editor integration are things that help streamline your workflow.
The Importance of a Strong Video Intro
An introduction is not limited to flashy graphics; what matters is an introduction of who you are and what they will expect after the introduction. Professional cuts are utilized, and branding is consistent; naturally, a clear voiceover won’t take that long to build familiarity and trust. As a content producer, marketer, or educator, a well-designed intro will ensure that your videos make a lasting impression.
With CapCut, it is simple to gather all of these elements in a single area without using various applications or intricate tools. You can create sleek animations to polish as well as alter the voice to make your intro shine through.
Benefits of Using CapCut for Intros
CapCut provides a simple workflow so that either an amateur or a professional can produce a quality intro without the challenge. It takes a lot to have a tool that is easy to use and, at the same time, sophisticated enough to be used for pretty much anything, such as editing YouTube, TikTok, or other professional things.
Consistency – The issue and difficulty that content creators face is that their videos should be recognizable. You can use CapCut to edit all your images and audio without losing brand identity in a single location. Templates, branded parts, and reusable materials ensure that your intros can always sound or appear like your content.
Customization – CapCut is free to do what you want, as opposed to fixed editors. In order to create a unique opening in accordance with your personal or professional style, you can use a large variety of fonts, filters, stickers, animations, and audio tools. You can easily customize it to either have some sleek corporate branding or to have some playful, fun visuals.
Professional Quality – The sound of the first part of your video establishes the mood of the video. Using CapCut, it is possible to mix clearly recorded voiceovers, smooth transitions with sharp visuals that give your intros a unique edge. Inbuilt sound equalization and tweaking also enable you to sharpen up voice clarity so your message sounds business-like and crisp.
Efficiency – Time is a precious thing to makers. You can do all that within CapCut, change between audio, graphics, and editing apps separately instead of moving to several apps. Adding voiceovers and creating thumbnails is just a small part of creating polished intros; you can create them in minutes instead of hours.
Engagement Boost –Good intros are designed to keep the audience captivated in the first second. CapCut helps you to add effects, creative imagery, and effective sound mixes that will capture your attention. You can establish the proper atmosphere and thereby increase the time people spend watching, along with the audience retention.
5 Simple Steps to Create a Professional Intro
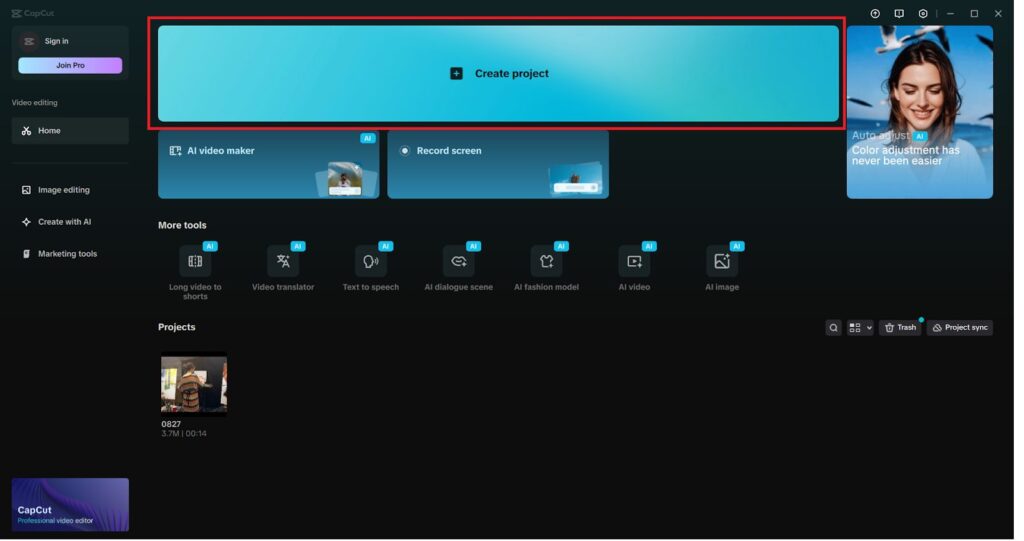
Step 1: Launch CapCut and Start a New Project
First, launch CapCut Desktop and make a new project. Upload your media files, logos, brand images, or background images, which will act as your starting point for your intro. This is one of the steps that establishes the opening sequence. CapCut also provides an online photo editor, which you can try for free!
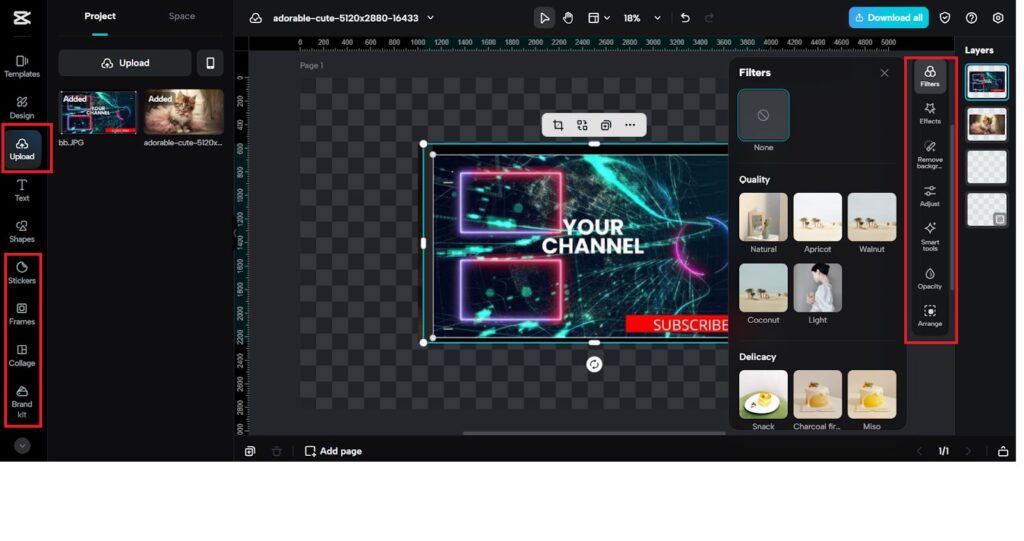
Step 2: Add and Edit Your Intro Graphic
Drag and drop the intro graphic into the timeline using the capabilities of CapCut. You can use the photo editor to sharpen your photos, change the brightness, contrast, or filter. Adding brand elements such as fonts, icons, or stickers based on your channel’s identity is also possible.
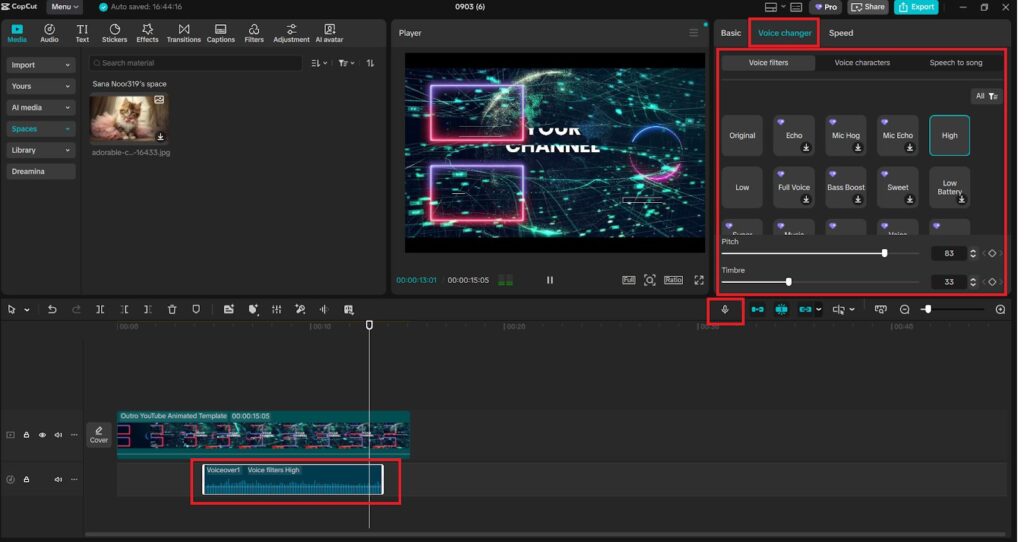
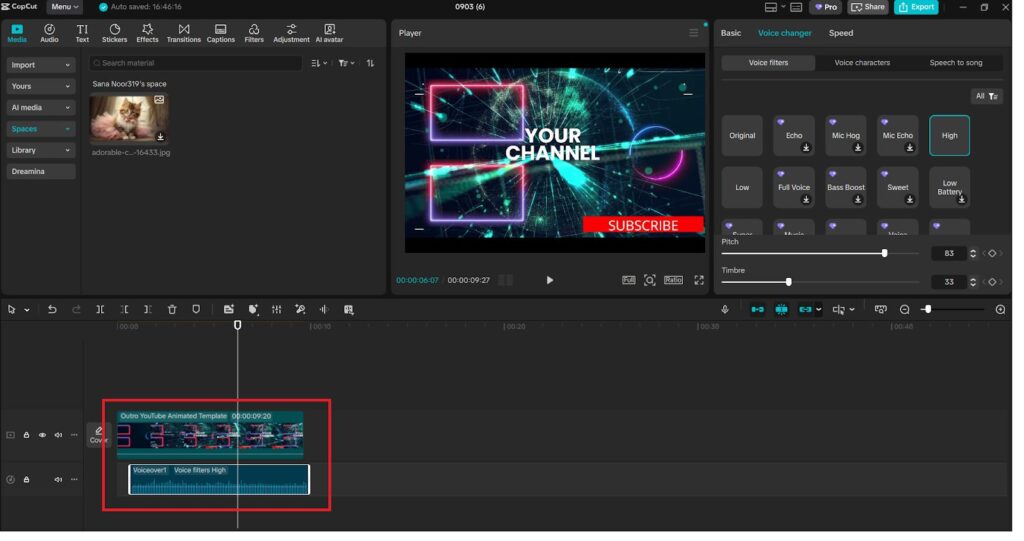
Step 3: Record or Import Your Voiceover
The visuals cannot at all happen without a strong voice-over. You have the option of recording your voice right there in CapCut or posting an already existing file. Whether you wish to become diverse or not, you can switch to the voice changer and change tone or style. This can also make your intro more interesting and exciting to your viewers.
Step 4: Sync Audio with Visuals
Drag the voiceover file onto the timeline and put it in line with your graphics. Video editing software produced by CapCut allows finding it quite simple to prune, divide, or reposition clips to ensure that all fits just right. Here, a slight touch of animation or transition adds to the ease with which your images move together with narration.
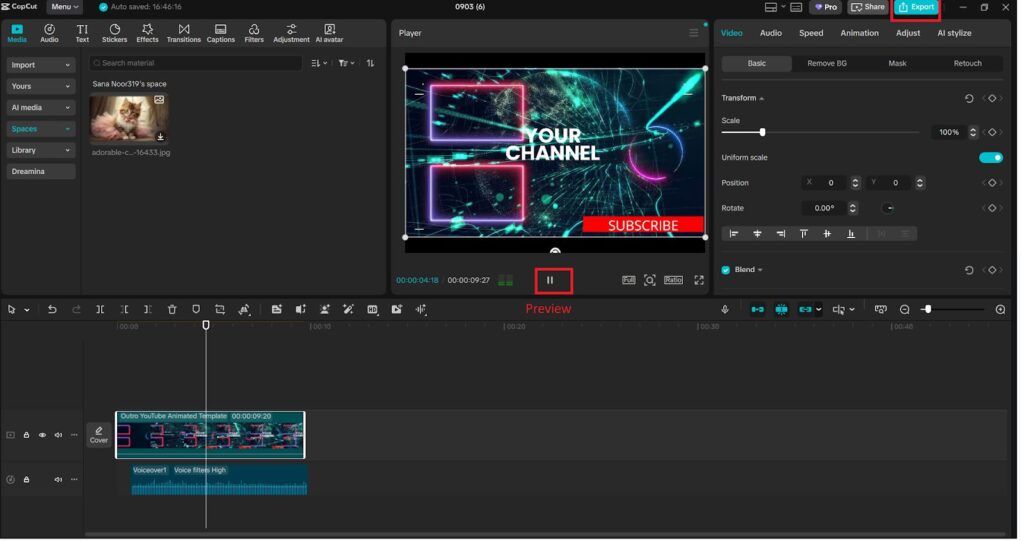
Step 5: Final Touches and Export
Do a preview of your intro before exporting so that nothing sounds like a disjointed mess. You can add more background music at a lesser intensity when you want, tune the transitions, and make sure there is clarity in the audio. When you are happy, save out your intro in a high-res format, which you will be able to attach to all your further videos.
Final Thoughts
The opening of your video is not only your introduction to your viewers but also your handshake with the audience. A professional edit graphic + a calculated voice will establish the entire tone of your other content. With CapCut Desktop, you are not required to be a professional editor to have professional results. To make it sound interesting and look showcased all the time, you can refer to what-you-can-do-without tools, including the voice changer, the photo-editing website, and so on.
Putting some work into your opening can go a long way in keeping people listening, creating brand awareness, and raising your video content in general.

